Example 2: Add a Project Dimension
This example shows how to add a new master-data dimension, such as a Project table, to the Centrify 360 model using the Setup Events list and the Configure card, and to link it to existing fact table such as Item Value Sales
1. Scenario
You have a Project table in Business Central and you want to expose it as a dimension so that facts (e.g. sales, production, GL) can be analyzed by Project.
Assumptions:
-
The Project table contains master data.
-
You know the table ID and the primary key field (e.g.
No.).
2. Step 1: Create a Project event
-
Open Centrify 360 Setup.
-
Choose Setup Events.
-
Create a new line:
-
Module: choose the appropriate module (e.g.
Baseor your custom module). -
Event Type: enter a technical name, for example
project. -
Target Table Name:
Project. -
Target Table Type:
Dimension. -
Add Default Row: True so that fact entries with no project no are linked to default N/A row.
-
Leave Is Hidden unchecked so the dimension is visible.
-

Why Project is modeled as a dimension
Project records are master data entities referenced by many transactions.
Modeling them as a dimension allows you to reuse a single set of attributes across multiple facts and to benefit from the automatic Company Name and Datasource ID columns.
3. Step 2: Map the Project BC table
-
With the
projectevent selected in Setup Events, choose Configure. -
On the Centrify 360 Setup Event Card, in the Setup Event Tables section (top), add a new line:
-
Module: same module as the event.
-
Table ID: the Project table ID.
-
Table Name: confirm via lookup.
-
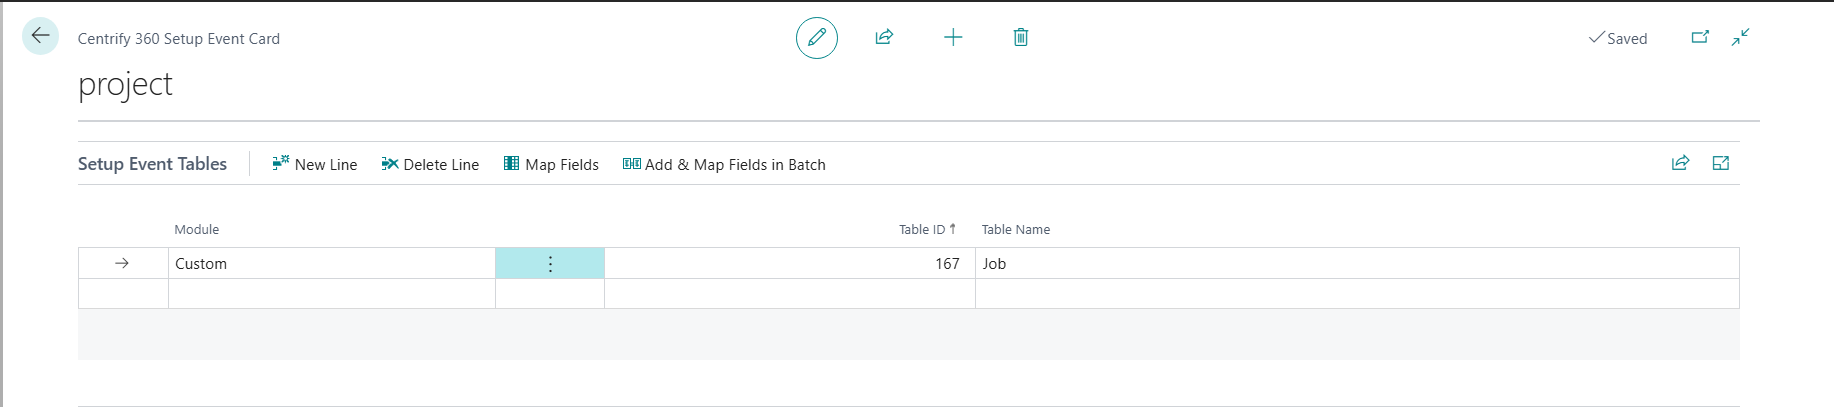
Typically there is a single Project table per event.
4. Step 3: Map Key and Descriptive Fields
-
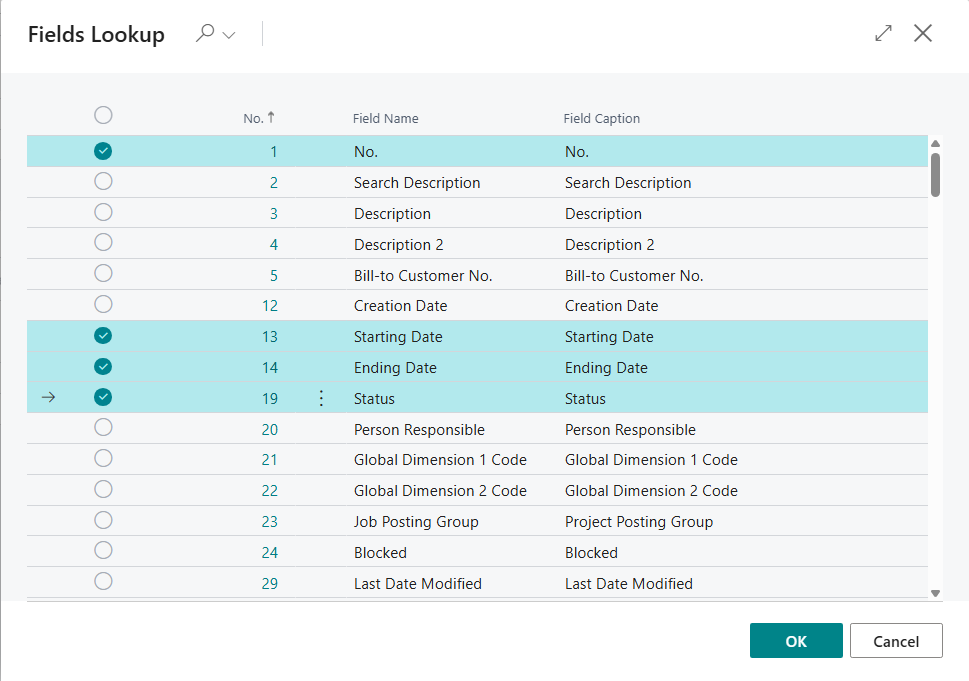
In the Setup Event Tables section (top of the card), click on Add & Map Fields in Batch.
-
Select the fields you want to map and click on Ok:
-
Project key (e.g.
No.) -
Descriptive fields (e.g.
Description,Status,Starting Date,Ending Date)
-
-
Validate that the fields are added properly as shown below.
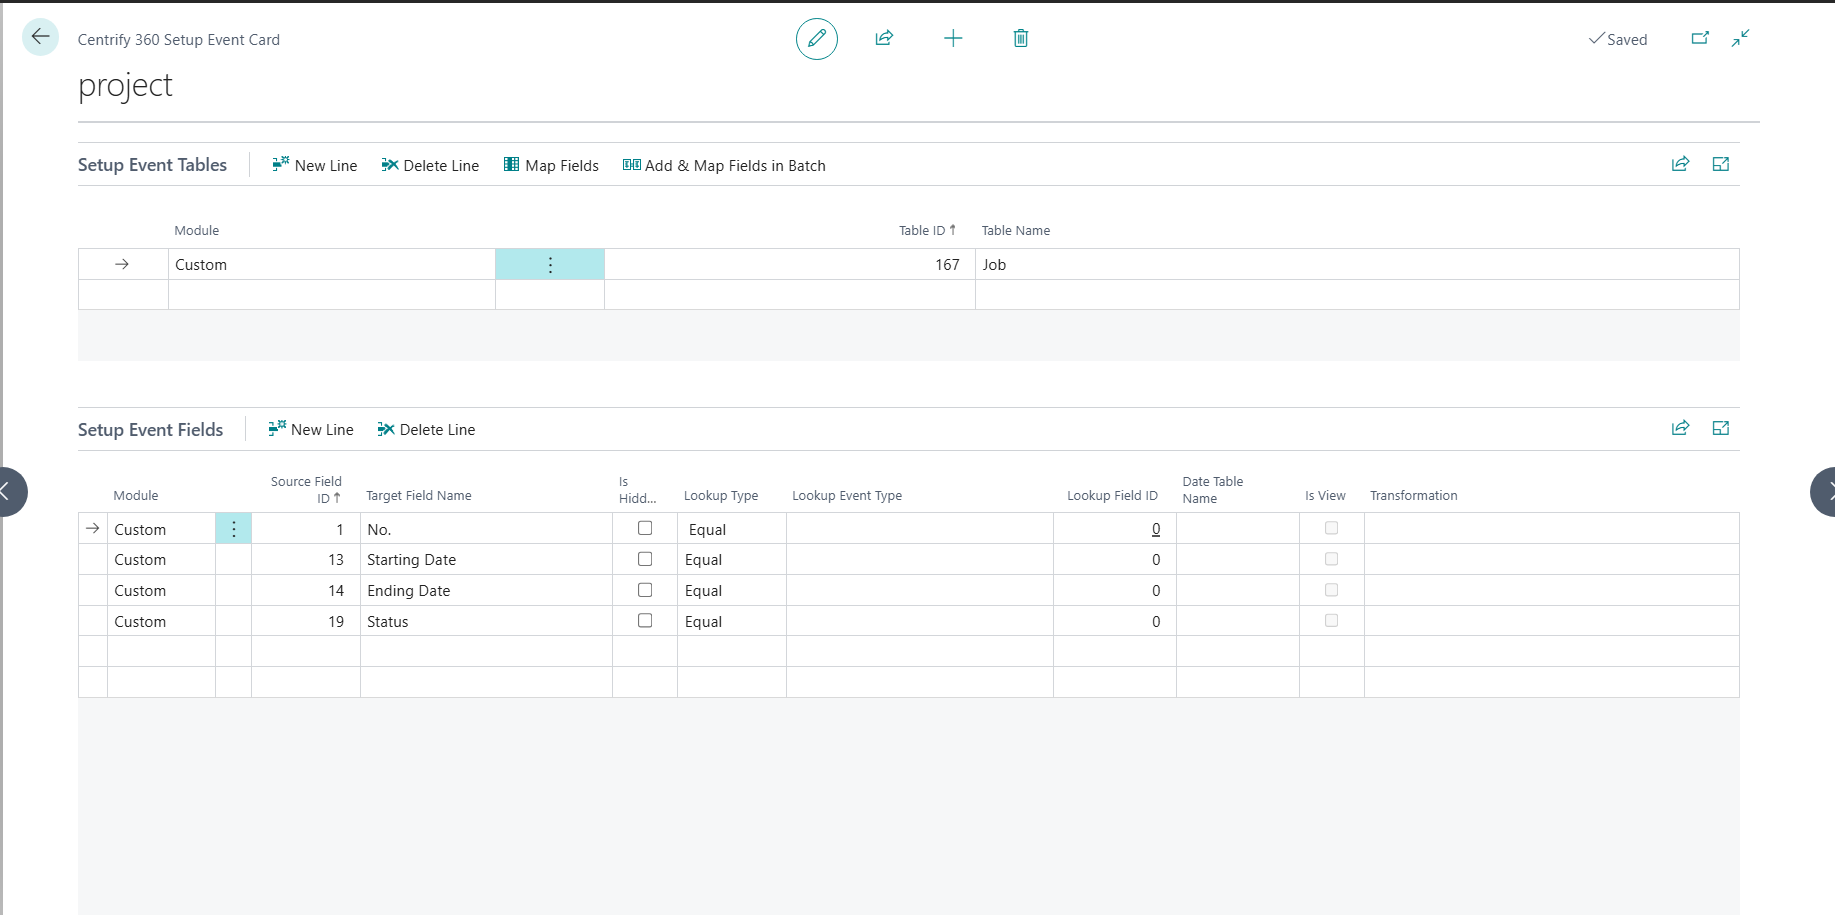
Why focus on key and core attributes
Dimensions are most useful when they contain a concise set of attributes that are meaningful in analysis. Keeping the Project dimension focused avoids overwhelming report authors and improves performance. Additional attributes can always be added later via the same process.
5. Step 4: Link to Item Value Sales Fact
-
Open Centrify 360 Setup.
-
Choose Setup Events.
-
Locate the event with Target Table Name =
Item Value Sales(Value Entry with Type Sale). -
Select this line and choose Configure.
-
Add & Map Fields in Batch, choose Project No., and click Ok
-
Fill Lookup Event Type to
project(the event name we choose earlier) -
Fill Lookup Field ID with the field id of the No. field (or lookup from list)
This will now create a relationship between the existing fact table and the newly added dimension table so that measures on the table can be filtered and sliced by the dimension fields.

6. Step 5: Deploy configuration and verify
-
Close the Centrify 360 Setup Event Card.
-
From Centrify 360 Setup, choose Deploy Configuration.
-
Sync Data from all companies
-
Refresh the semantic model in Power BI.
-
Verify that:
-
A
Projectdimension table exists. -
It includes key and descriptive fields mapped in Setup Event Fields.
-
Company NameandDatasource IDare present as technical columns. -
You are able to slice the Cost measure by project.
-