On-Premise Installation
1. Overview
This guide covers the On-Premise installation of Centrify 360 for Microsoft Dynamics 365 Business Central.
For customers using Azure and the Microsoft commercial marketplace, Centrify 360 is also available as an Azure Managed Application. In that case, refer instead to Managed SaaS Installation.
This document provides an outline for installing the Centrify 360 solution directly on your own infrastructure. The installation process involves setting up the source system extension, the ETL orchestrator, the target database, and the reporting tool. The process is designed to be incremental and modular, allowing for testing at each stage.
2. Prerequisites
Before beginning the installation, ensure the following requirements are satisfied:
2.1. System Requirements
-
Operating System: Windows 10/11, Windows Server 2016/2019/2022 (for orchestrator and database setup).
-
Hardware: Recommended 8 GB RAM, and 50 GB free disk space (scales with data volume).
-
Network Access: Stable internet connection for license validation.
2.2. Software Dependencies
-
Microsoft Dynamics 365 Business Central: Active subscription (SaaS or on-premises version 19 (2021 Release Wave 2) or later).
-
Power BI: Desktop version (free) or Pro/Premium for sharing reports.
-
Development Tools: Windows PowerShell for publishing the extension and Power BI reports to Power BI Online (optional).
3. Required Artifacts
Gather the following files and resources before installation:
-
Business Central Extension: The .app file for publishing the extension.
-
Centrify 360 Installer: The .exe installer for Centrify 360 to install on a server (on-premise, Azure VM, VPS, etc.).
-
Power BI Reports: Power BI .zip file containing the standard reports provided by Centrify 360.
-
Configuration Packages: Excel configuration package to be loaded into Business Central after the extension is published. There is a standard configuration package for the 6 standard modules (Sales, Purchases, Payables, Receivables, Inventory, Finance) and an additional configuration file per additional module (Retail, Fixed Assets, …).
These artifacts can be downloaded from the Centrify 360 website (https://centrify360.com).
4. Installation Steps
4.1. Step 1: Install Business Central Extension
To install the Centrify 360 Connector app, you will first need to add our module to your Business Central license:
-
Contact your Business Central implementation partner and ask them to provide us their 'Reseller PartnerSource Business Center Account Number'.
-
We will then add your partner as our Authorised Reseller.
-
Once your partner has been added as our Authorised Reseller, they can update your Business Central license and add our module, which is called '73446575 Centrify 360 Connector'.
This step can be completed by following the official Microsoft guide for publishing extensions:
https://learn.microsoft.com/en-us/dynamics365/business-central/dev-itpro/developer/devenv-how-publish-and-install-an-extension-v2
After completing the publish step, you should be able to see the following pages in Business Central for configuration:

4.2. Step 2: Fetch Companies' Fingerprints & Get a License
The software license is coupled to a Business Central company fingerprint.
The fingerprint should be extracted from all companies where BI is required.
To do so:
-
Navigate to Centrify 360 Setup page.
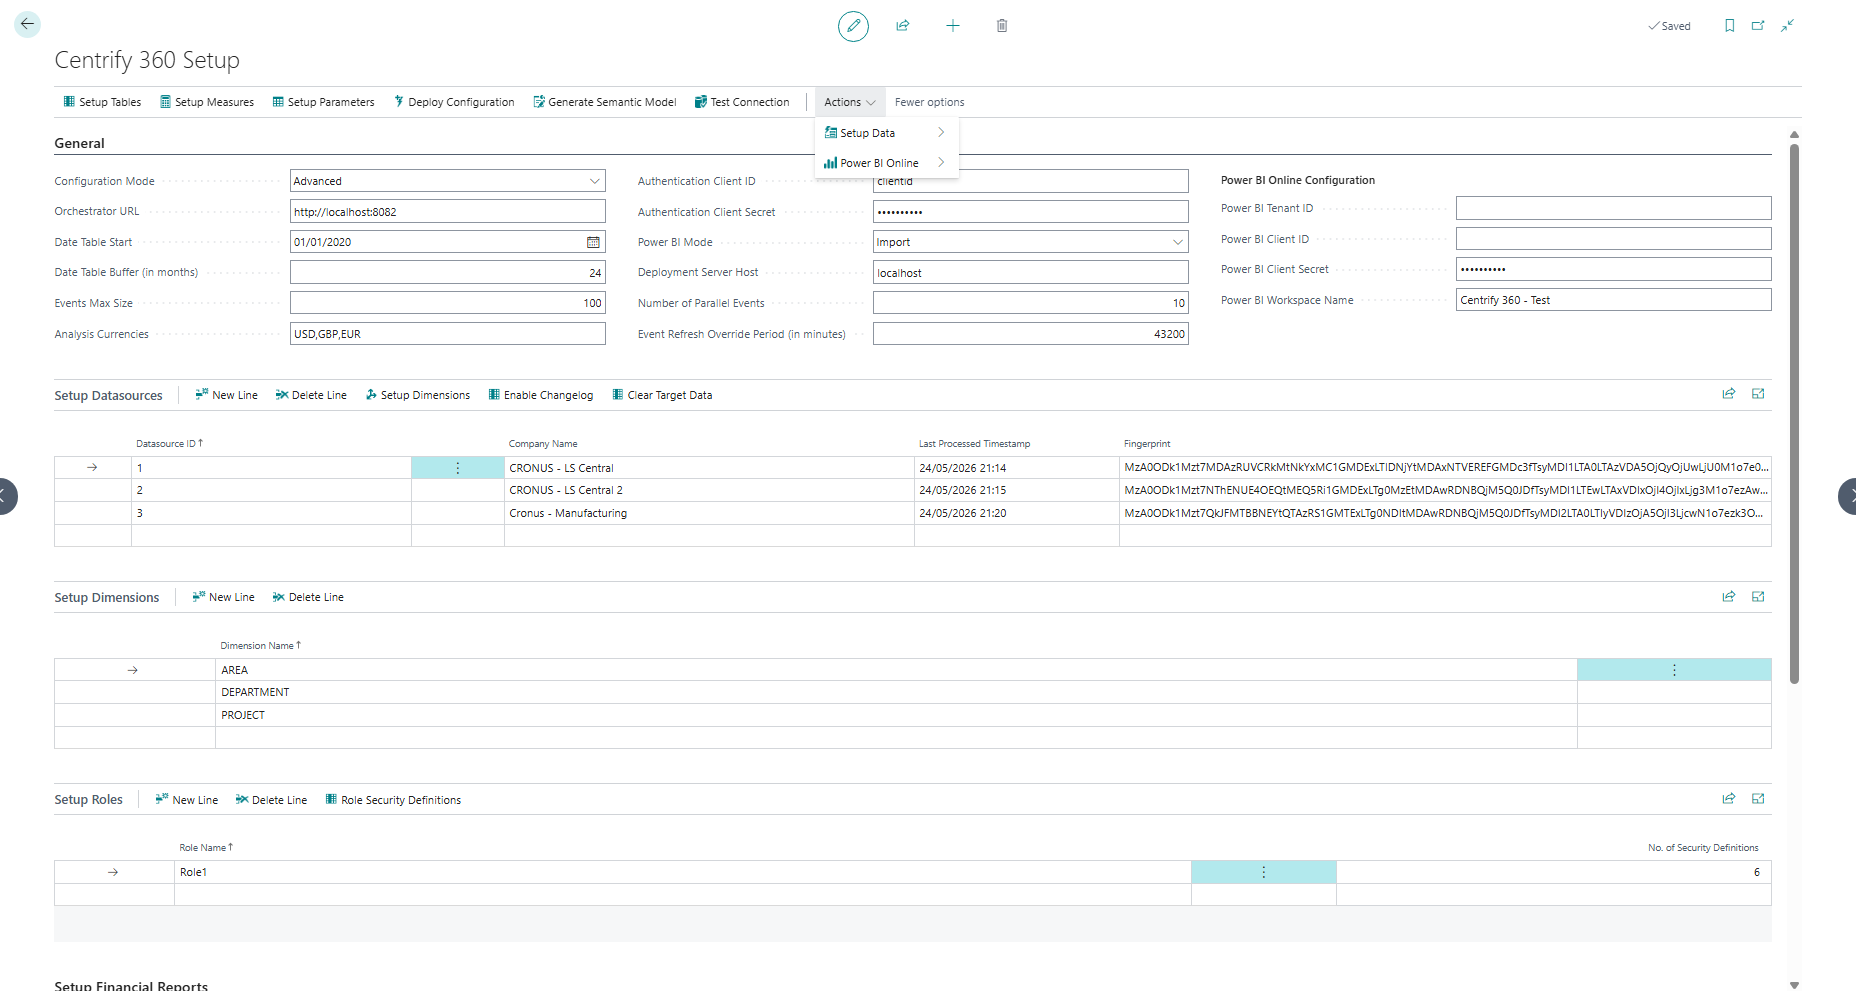
-
Fill Datasource ID and map it to the required company name.
-
Repeat this step for all companies that you would like to integrate with Centrify 360.
-
The fingerprints will be shown for each row as in the screenshot above.
Once we receive the fingerprints, a license.lic file will be provided to you for the rest of the steps.
4.3. Step 3: Install Centrify 360
The next step is to install Centrify 360 Orchestrator & Datalake on a target server (can be a cloud VM, local server, …).
Open Centrify360Setup.exe on the target deployment host and follow the steps below.
4.3.1. Postgres Configuration
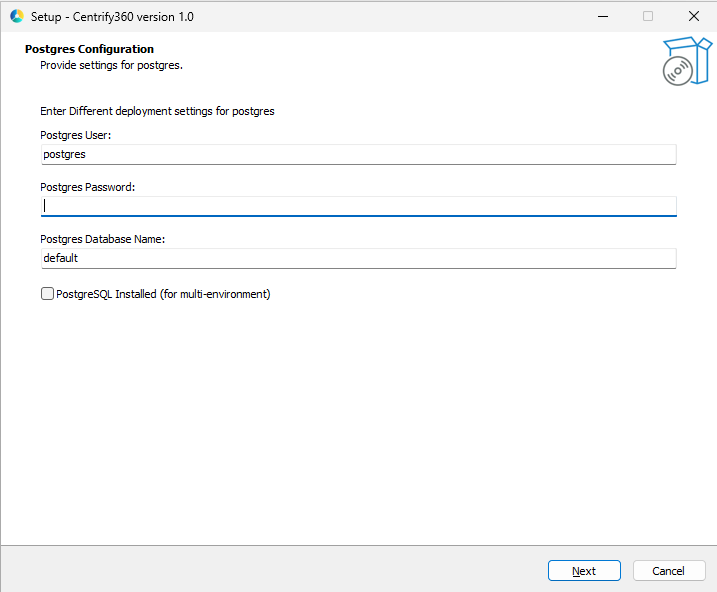
Choose a username and strong password for the Postgres super-admin user.
Make sure to include special characters, lowercase, uppercase, and numbers in your password.
If an existing installation was already performed and you would like to install a different orchestrator instance (multi-environment), you can enable the checkbox and point to the existing PostgreSQL installation.
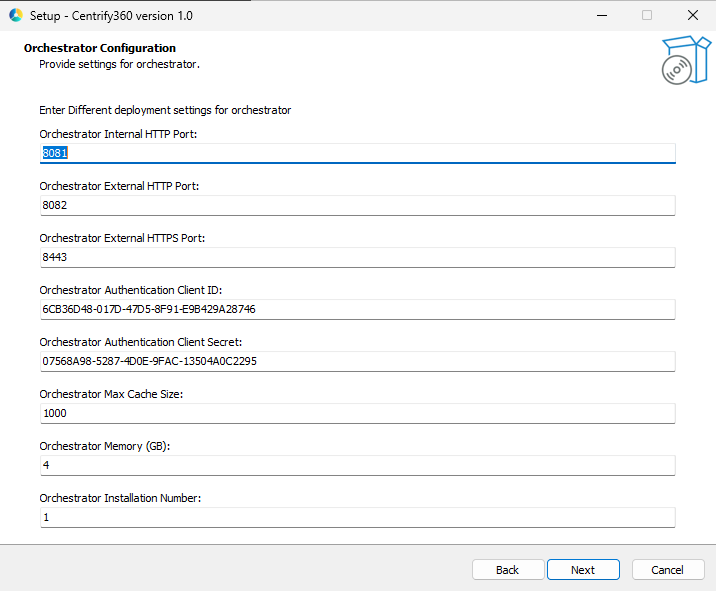
4.3.2. Orchestrator Configuration
-
Orchestrator Internal HTTP Port: The HTTP port used internally by the orchestrator to receive data and perform transformations.
-
Orchestrator External HTTP Port: The HTTP port used externally by the orchestrator to receive data and perform transformations.
-
Orchestrator External HTTPS Port: The HTTPS port used externally by the orchestrator to receive data and perform transformations.
-
Orchestrator Authentication Client ID: This is an auto-generated GUID that will be used later for authentication between BC and the orchestrator (keep as is).
-
Orchestrator Authentication Client Secret: This is an auto-generated GUID that will be used later for authentication between BC and the orchestrator (keep as is).
-
Orchestrator Max Cache Size: This is an advanced property related to caching logic inside the orchestrator (keep as default).
-
Orchestrator Memory: This should be sized according to the volume of the data (4 is the default, increase for larger data).
-
Orchestrator Installation Number: This should only be changed for multi-environment (multiple orchestrators on same machine).
|
All selected ports, alongside the default PostgreSQL port (5432), have to be available (not in use) on the deployment server. |
4.3.3. License Configuration
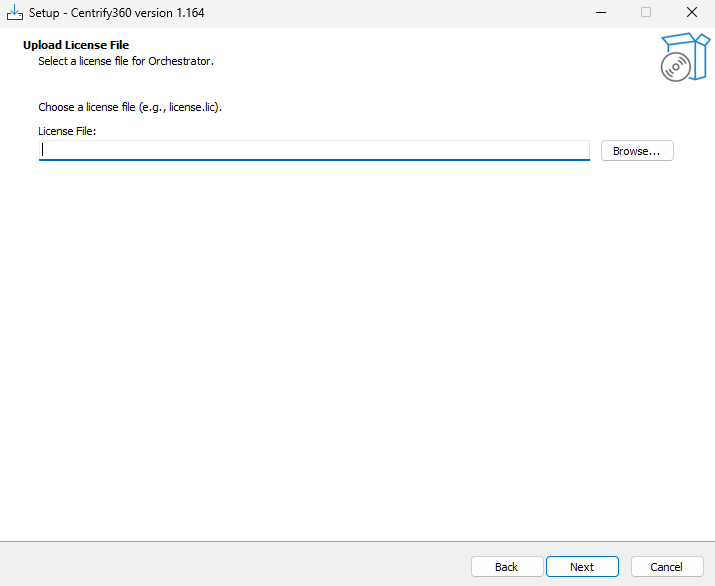
Choose the license.lic file that was obtained from the Centrify 360 team.
|
This step is crucial and the file has to be a valid license, or else the installation will fail. |
4.3.4. HTTPS Configuration
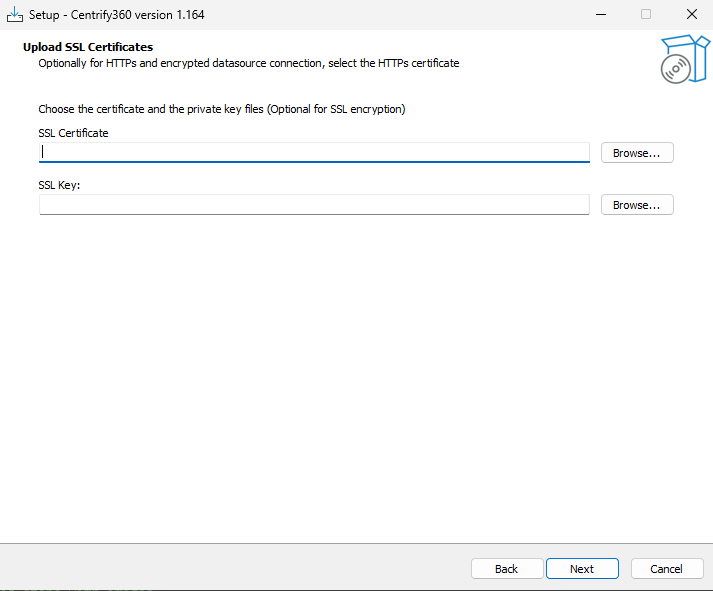
Please refer to HTTPS Configuration for more information.
If no certificate and key are provided, the service will use HTTP for communication.
4.3.5. Installation Finalization
Once the installation is finalized, navigate to Services on Windows. You should be able to see the related services up and running as shown in the screenshot below:

|
If the deployment server is different than the BC server (or using BC SaaS), the orchestrator external port (HTTP or HTTPS) should be opened and available for external calls. |
5. Next Steps
Please refer to Basic Configuration for the next steps.