Basic Configuration
1. Overview
This document provides an outline for configuring the Centrify 360 solution for Microsoft Dynamics 365 Business Central.
The configuration process assumes that the installation step in either:
was completed successfully.
2. Configuration Steps
2.1. Step 1: Install Required Modules
-
Navigate to Centrify 360 Setup page.
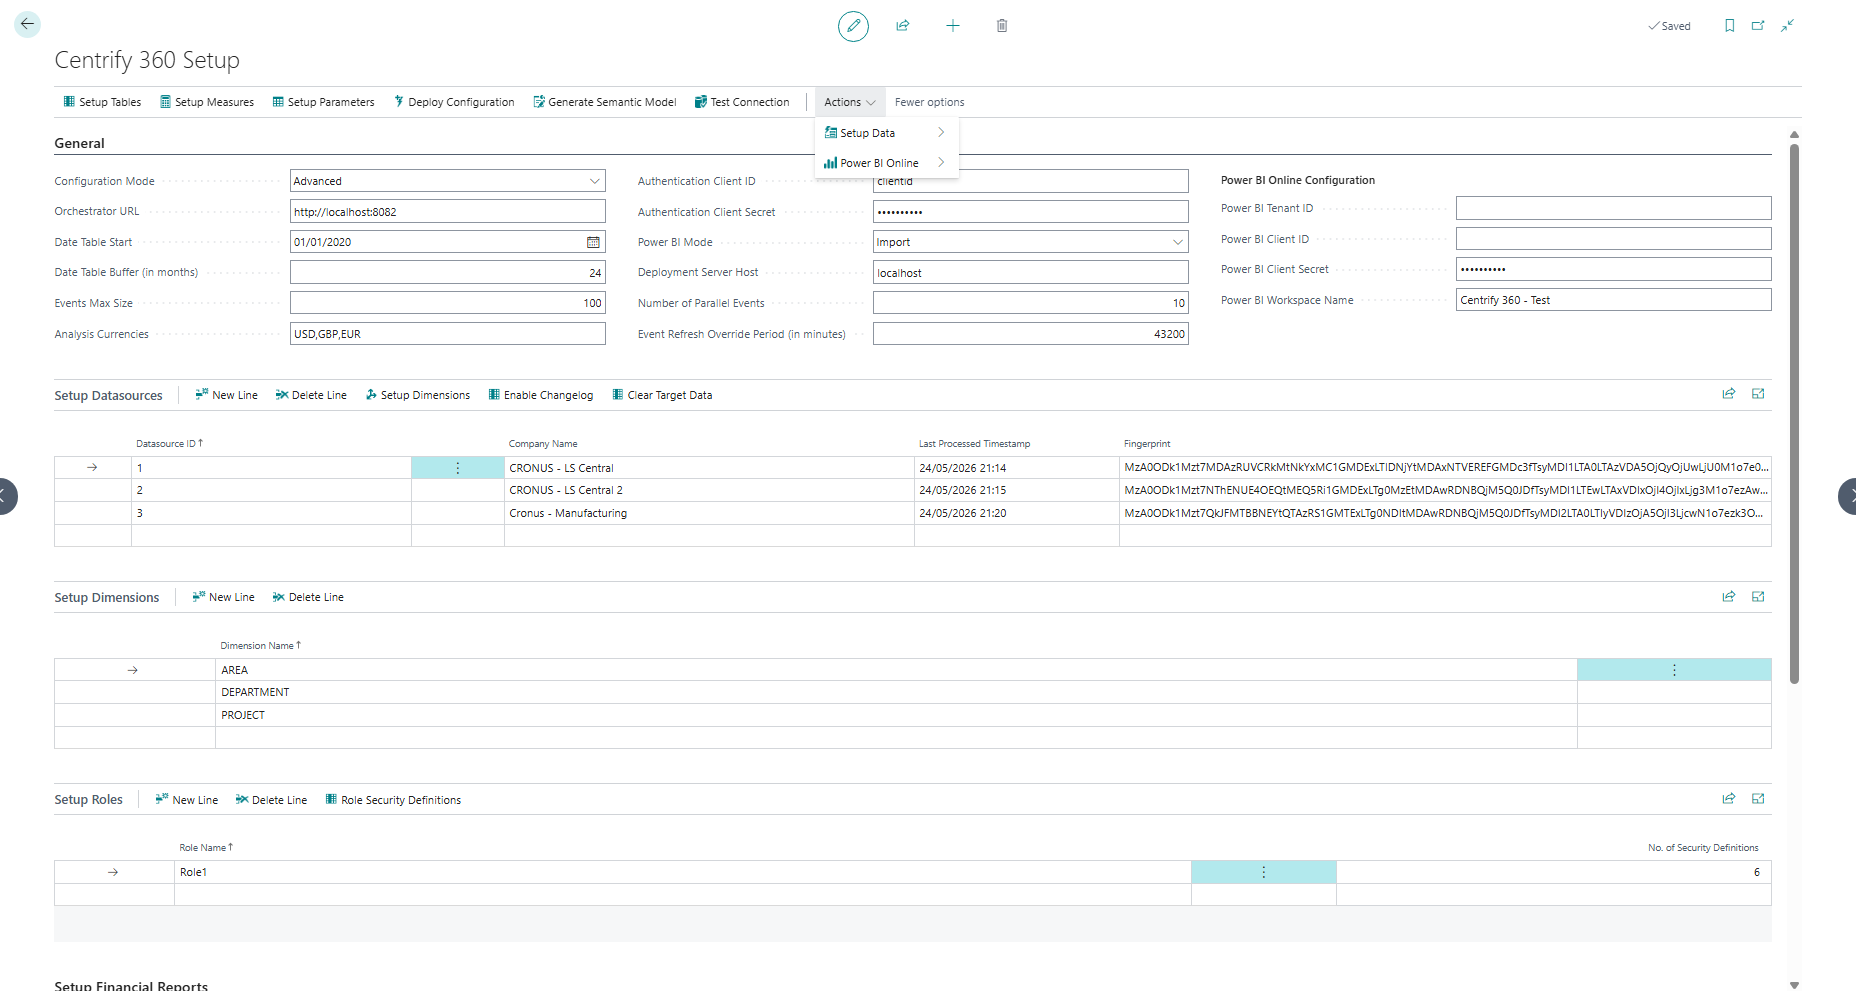
-
In the action bar, navigate to Setup Data and select Install Centrify 360 Modules.
-
A module selection dialog will appear. Select each module you wish to install by checking the corresponding entry in the list.
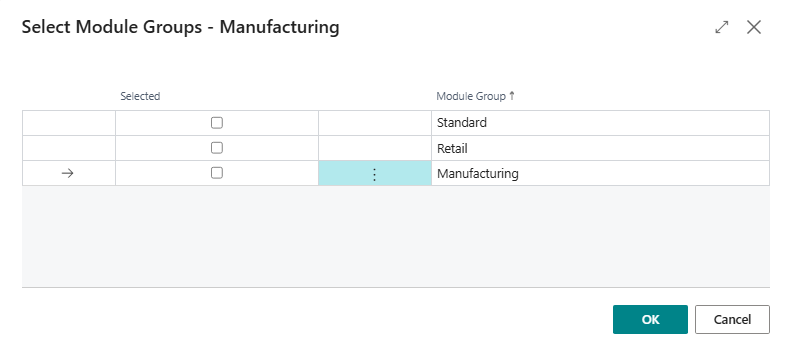
-
Click OK to confirm the selection.
The system will apply the default configuration for the selected modules and display a confirmation message upon completion.
|
Only select and install modules for which a valid license has been purchased. Installing an unlicensed module will cause license validation to fail during data synchronization. |
2.2. Step 2: Global Configuration
-
Navigate to Centrify 360 Setup page.
You now have two ways to obtain the connection details, depending on how Centrify 360 was deployed.
2.2.1. Option A: On-Premise Deployment (installation-output.json)
If you installed Centrify 360 using the on-premise installer:
-
Open your
installation-output.jsonfile in the installation path chosen during the on-premise installation.
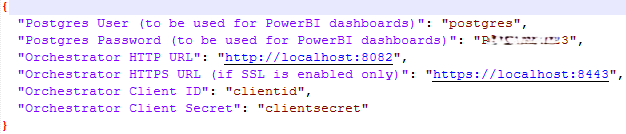
-
Use the values in
installation-output.jsonto populate the fields described below (Orchestrator URL, Authentication Client ID/Secret, etc.).
2.2.2. Option B: Managed SaaS Deployment (Azure Marketplace Outputs)
If you deployed Centrify 360 via the Azure Marketplace managed application:
-
In the Azure portal, go to the resource group where you deployed Centrify 360.
-
In the left-hand menu, select Deployments.
-
Open the most recent deployment created by the Marketplace wizard.
-
Select the Outputs tab. You will see values such as:
-
containerAppUrl– External URL of the ETL orchestrator container app. -
postgresServerFqdn– FQDN of the PostgreSQL flexible server. -
postgresServerName,storageAccountName,logAnalyticsWorkspaceName,containerAppsEnvName,containerAppName,planDeployed,syncWindowMode.
-
Use at least:
-
containerAppUrlas the Orchestrator URL in Business Central. -
postgresServerFqdnlater for Power BI / direct database connections.
2.2.3. Centrify 360 Setup Fields
Fill the required details in Centrify 360 Setup based on the deployment option chosen above:
-
Configuration Mode:
Whether you would like to enable advanced or simple configuration mode. We recommend you start with Simple mode, and once you need extra features you can switch to Advanced mode easily. Advanced configuration mode unlocks some advanced customizations and transformations like:-
Range Parameters
-
Datasource Specific Overrides in Financial Reports
-
POP/PTD in Measures
-
Advanced transformations on fields (Default values, source table filters, etc.)
-
-
Orchestrator URL:
-
On-Premise:
-
If your installation was done on the same server as your BC instance (on-premises only), input the URL based on the chosen mode (HTTPS if HTTPS was configured, HTTP if not).
-
If not, input
http://ServerIP:HTTPPortorhttps://ServerIP:HTTPSPortbased on your setup. The selected ports should have inbound connections allowed on the server.
-
-
Managed SaaS:
-
Use the value of
containerAppUrlfrom the Azure deployment outputs. This is the external endpoint used by Business Central to send data to the orchestrator.
-
-
-
Orchestrator Client ID & Secret:
-
On-Premise:
-
Input the values as shown in
installation-output.json.
-
-
Managed SaaS:
-
Use the Authentication Client ID and Authentication Client Secret you provided when deploying the managed application from Azure Marketplace.
-
-
-
Date Table Start:
The first date where you had any transaction in BC across all companies. -
Date Table Buffer:
Choose a buffer (in months) that should be maintained above each run’s date, to cater for date tables with future data (Due Date, Shipment Date, …). -
Events Max Size:
This is the maximum number of events sent in a single HTTP request. Set to5000for best performance. -
Analysis Currencies:
This is a comma-separated list of analysis currencies needed later on in Power BI. Choose all your companies' LCY currencies, plus any additional currency you would like to view your data by. -
Power BI Mode:
This is the mode the Power BI model will be loaded in. Choose Import mode for best performance. Refer to https://learn.microsoft.com/en-us/power-bi/connect-data/desktop-directquery-about for more details. -
Deployment Server Host:
This is the host name or IP used to connect from Power BI to the star schema model in PostgreSQL.-
On-Premise:
-
If you plan to open Power BI reports on a different machine than the deployment server, set this to the public IP or DNS name of the server. In this case the PostgreSQL default port
5432should allow inbound connections. -
If you plan to publish to Power BI Online, you can set this to
localhostand use a Data Gateway.
-
-
Managed SaaS:
-
Use the value of
postgresServerFqdnfrom the Azure deployment outputs.
-
-
-
Number of Parallel Events:
Data will be sent from Business Central in parallel and this is the number of workers to be used. Choose the maximum number of job queue entries (10) for optimal performance. -
Event Refresh Override Period:
This is the period in minutes for which data is sent even if it was already sent. This should only be set to a non-zero value for Retail installations with SQL replication. -
Refer to Dimensions for Business Central dimensions setup.
-
Refer to Object/Row Level Security for defining security roles on your data.
-
Once all fields are set, click on Test Connection. This should output a Connection Established Successfully message.
-
Click on Deploy Configuration. This will deploy your configuration to the orchestrator, clear the target data completely, and download the
model.bimfile which will be used later to visualize your data in Power BI.
|
Any later change to the configuration, whether customizations or dimension setup, requires a redeploy of the configuration. |
|
If HTTP usage is selected, you need to Enable HTTP Requests in Extension Management page for the Centrify 360 Extension in Business Central. |
2.3. Step 3: Company Configuration
|
The below steps should be completed for each company. |
-
Navigate to Centrify 360 Company page.
-
Click on Enable Changelog for each company, which will allow incremental changes to be sent.
-
Refer to Dimensions for Business Central company dimensions setup.
|
The Enable Changelog step is crucial for data correctness and shall not be skipped. |
2.4. Step 3: Data Sourcing Job
|
Managed SaaS: If you are using a Scheduled plan, ensure the integration schedule aligns with the configured sync window. |
|
If any incremental job fails later on for any reason, the system is designed to be fail-safe. The next successful incremental run will ensure data accuracy automatically. |
2.4.1. Option A: Automatic Setup (Recommended)
Navigate to the Centrify 360 Setup page. The following actions are available under the Job Queue Entry group:
| Action | Description |
|---|---|
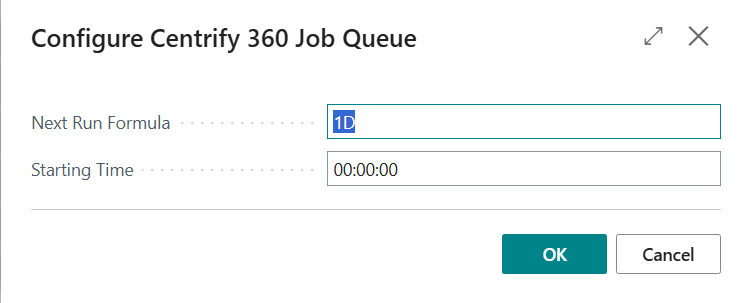
Configure Integration Job (All Companies) |
Opens a configuration dialog where you set the recurrence formula, starting time, and weekend preference. The job queue entry is created or overwritten for every non-external company with a 1-minute stagger between companies to prevent concurrent execution. |
Put Integration Job On Hold (All Companies) |
Pauses the scheduled job across all companies without deleting it. Use this before performing maintenance or data corrections. |
Resume Integration Job (All Companies) |
Sets the scheduled job back to Ready across all companies after it has been put On Hold. |
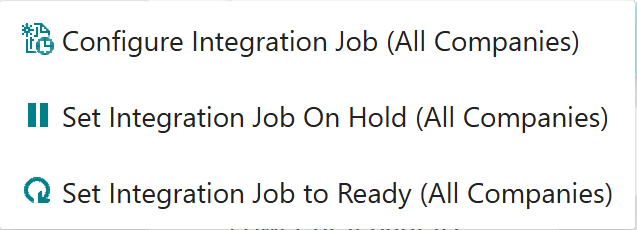
When using Configure Integration Job (All Companies), the following dialog will appear:
|
Each company receives a 1-minute staggered start time automatically to prevent resource contention. Company 1 starts at the configured time, Company 2 at +1 minute, Company 3 at +2 minutes, and so on. |
2.4.2. Option B: Manual Setup (Per Company)
|
If configuring manually, the below steps must be completed for each company individually. |
-
Navigate to the Job Queue Entries page.
-
Add a new job to run the data sourcing Codeunit: Codeunit ID is 73446575.
-
Set the schedule of the job to run. Each run will send only incremental changes (delta). Refer to Microsoft’s Job Queue documentation for more information.
-
Run the job once and verify the status is Successful.
2.5. Step 4: Power BI Setup
-
Make sure Power BI is installed and ready.
-
Extract the
PowerBI.zipfile. -
Navigate to
PowerBI/SemanticModel/Model. -
Copy the generated
model.bimfile (downloaded in Step 2 above) here and make sure its name ismodel.bim. -
You can now open any report, refresh your model, and visualize your data.
-
Refer to Publish to Power BI Online for steps on how to publish these reports to Power BI online.