Integrated Publish & Update
1. Overview
Centrify 360 provides an automated deployment mechanism for publishing and updating Power BI Reports directly from the Business Central app.
This method uses an Azure App Registration with service principal authentication to interact with the Power BI REST APIs on your behalf — no manual use of Power BI Desktop is required for deployment or updates.
2. Prerequisites
Before configuring the automated publish flow, complete the following one-time setup steps in Azure and Power BI Online.
2.1. Step 1: Create the Power BI App Registration
Complete Power BI App Registration before continuing.
You will need the generated Client ID, Tenant ID, and Client Secret during installation or deployment of Centrify 360 components that integrate with Power BI APIs.
2.2. Step 2: Create a Workspace in Power BI Online
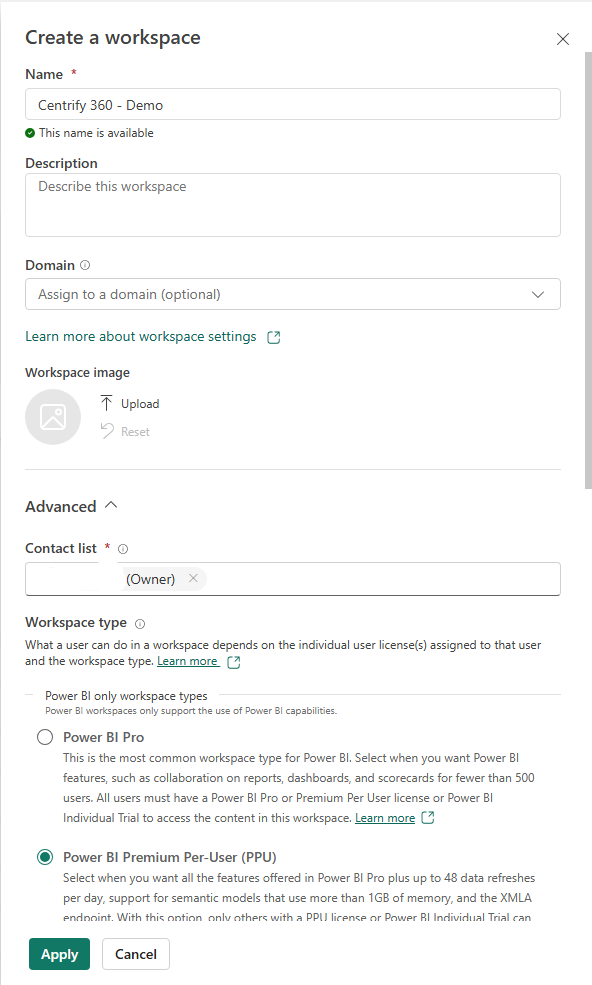
A dedicated workspace is required to host the Semantic Model and all associated reports.
-
Sign in to Power BI Online.
-
Click Workspaces > Create a workspace.
-
Provide a workspace name and configure access settings as appropriate for your organisation.
-
Note down the exact workspace name — it must match the value entered in the Centrify 360 configuration exactly.
2.3. Step 3: Add the App Registration as Contributor to the Workspace
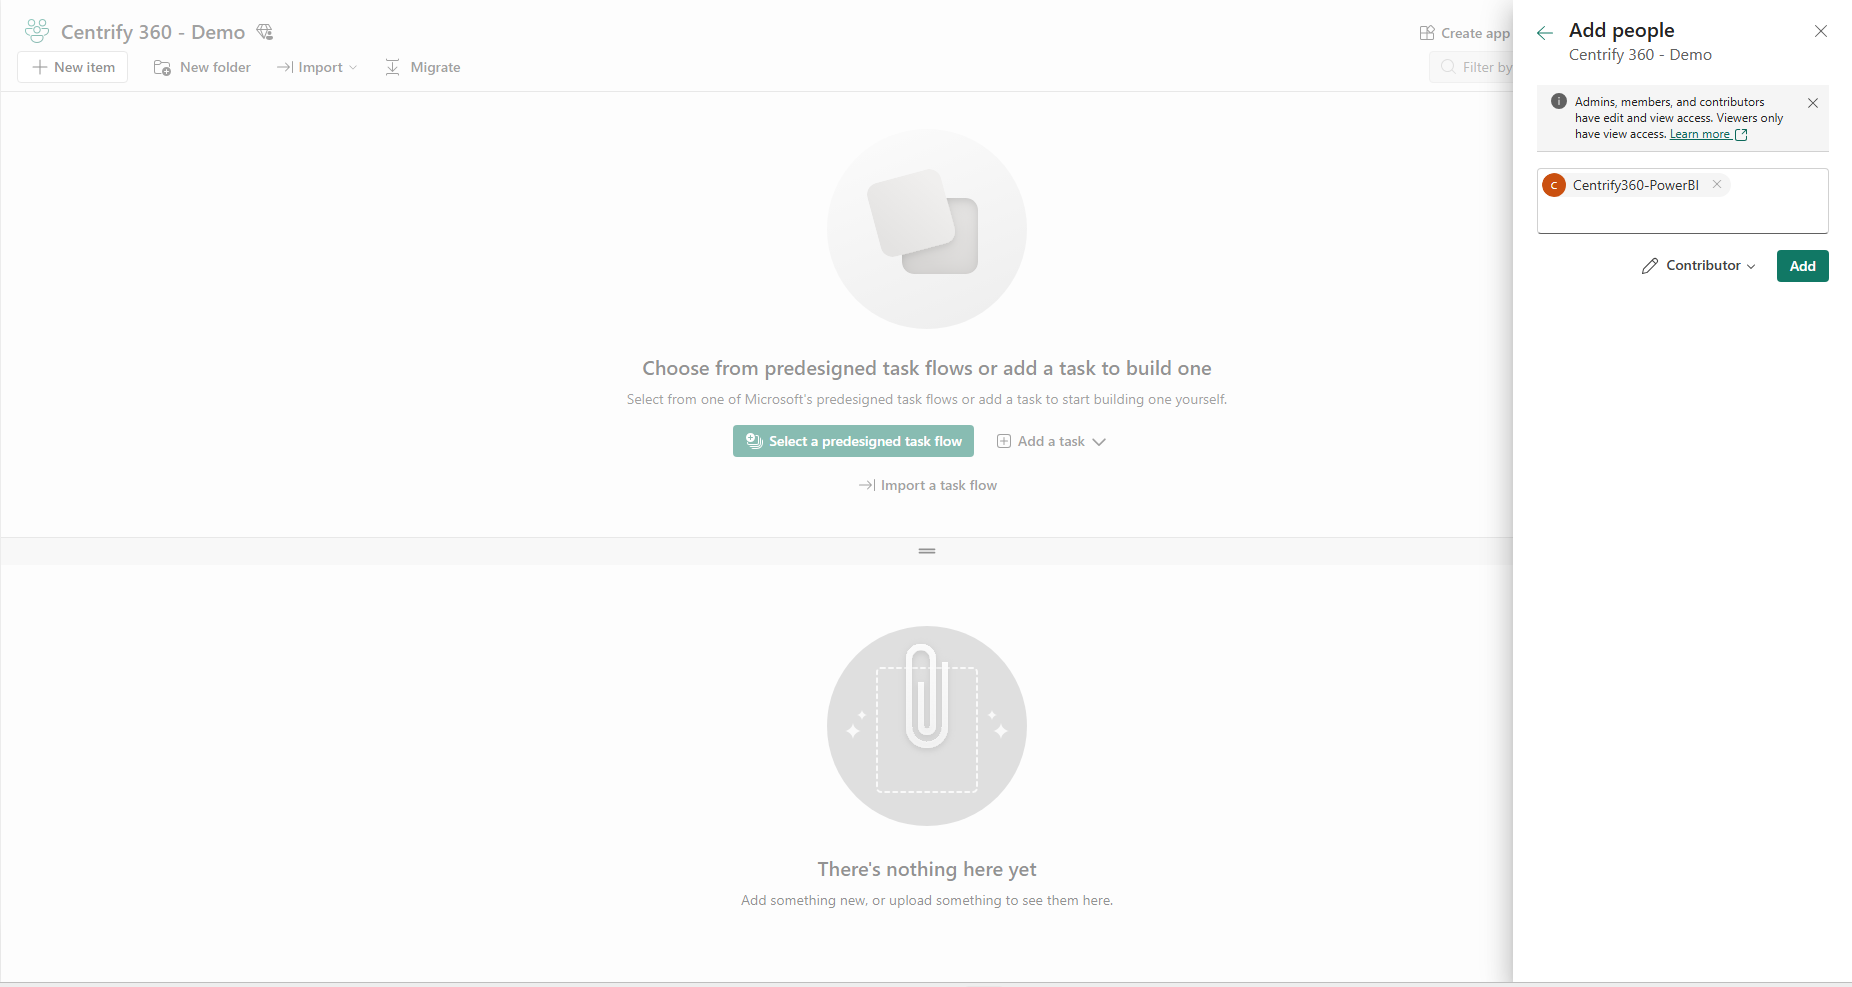
The service principal must have Contributor access to the workspace in order to publish and update content.
-
Open the workspace in Power BI Online.
-
Click Manage access.
-
Click Add people or groups.
-
Search for the App Registration by name (e.g.,
Centrify360-PowerBI) and assign it the Contributor role. -
Save the changes.
2.4. Step 4: Review Service Principal API Access
Confirm that the tenant setting described in Power BI App Registration is enabled.
If your tenant already allows service principals to use Fabric APIs, no further action is required.
|
This setting may take a few minutes to propagate after being enabled. If the deployment fails immediately after enabling, wait 5–10 minutes and retry. |
3. Configuration in Centrify 360
3.1. Step 5: Add Configuration in the BC App
Once the Azure and Power BI prerequisites are in place, complete the remaining Power BI Online configuration in the Centrify 360 Business Central app.
-
Open the Centrify 360 Setup page in Business Central.
-
Under the Power BI Online Configuration section, enter the following value:
-
Workspace Name — The exact name of the Power BI workspace created in Step 2
-
-
Save the configuration.

4. Deployment
4.1. Step 6: Install Semantic Model & Reports
With configuration saved, use the built-in action to deploy all reports to Power BI Online.
-
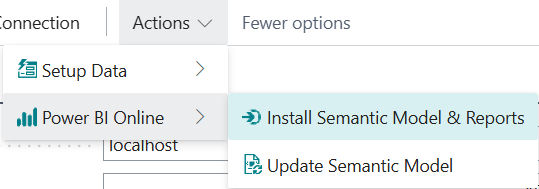
On the Centrify 360 Setup page in Business Central, click the Power BI Online > Install Semantic Model & Reports action.
-
Centrify 360 will authenticate using the configured service principal and perform the following:
-
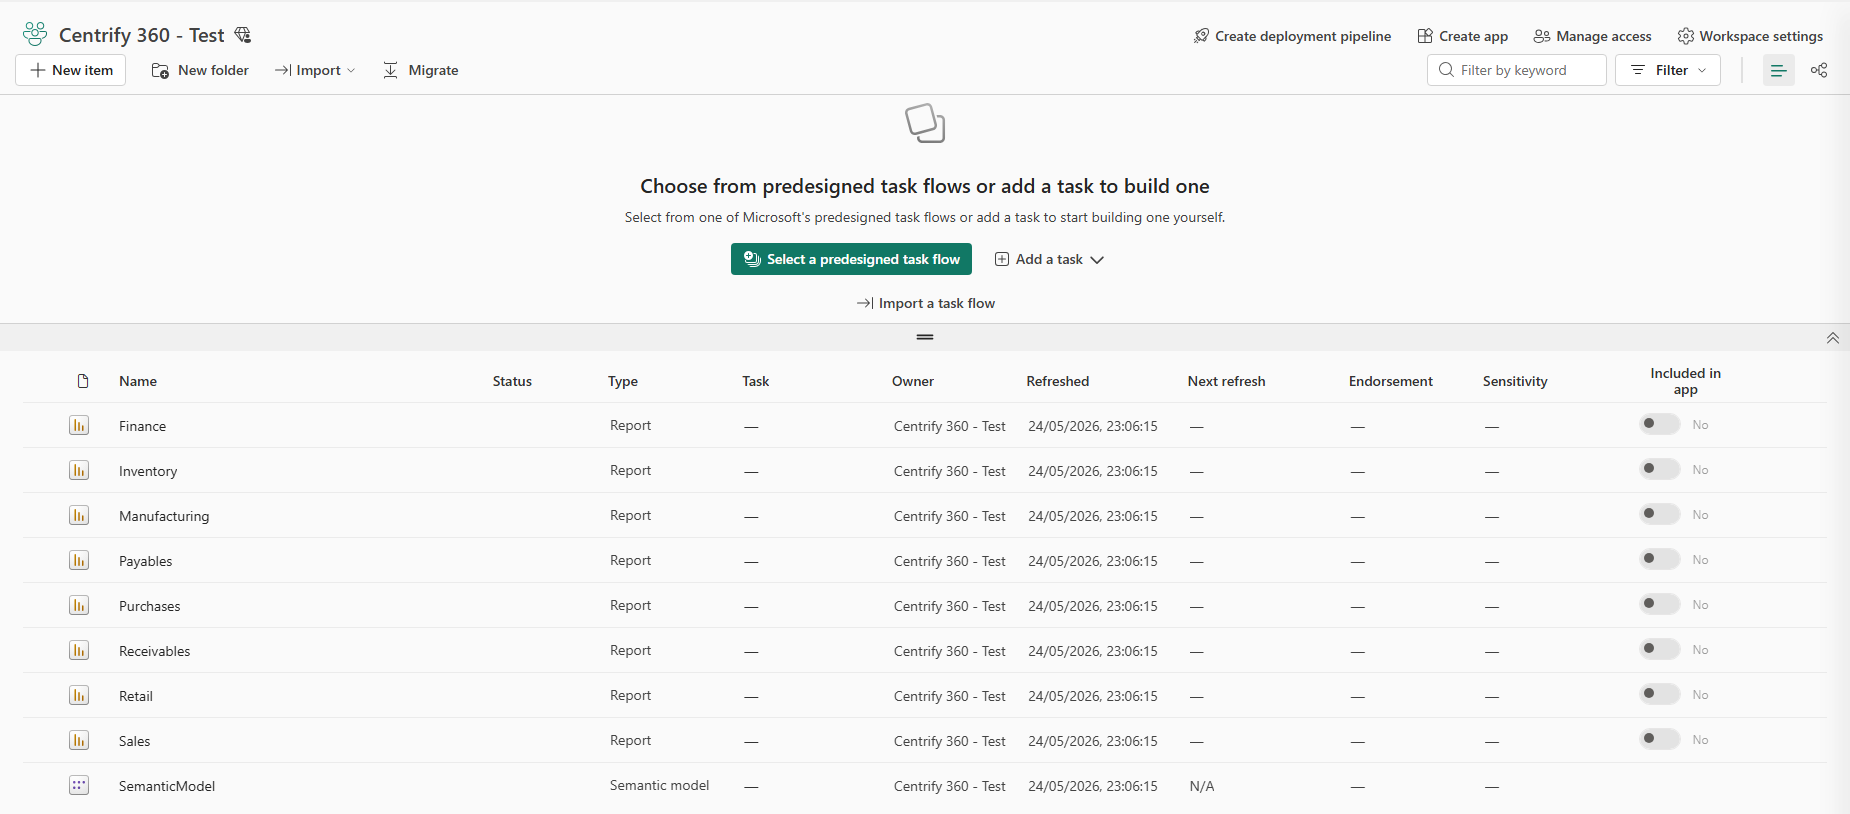
Publish the Semantic Model to the specified workspace.
-
Bind all report modules to the published Semantic Model.
-
Publish each individual report in report-only mode to the workspace.
-
-
Monitor the progress notifications in Business Central.
-
Once complete, verify in Power BI Online that the Semantic Model and all reports appear correctly in the workspace.
|
The action make take a couple of minutes to finalize. Please wait for the Deployment Successful message to be shown. |
4.2. Step 7: Update Semantic Model After Configuration Changes
Whenever a configuration change is made in Centrify 360 that affects the Semantic Model (for example, enabling or disabling modules, adding measures, or changing tables/fields), the published Semantic Model must be updated.
-
Apply the required configuration changes in the Centrify 360 configuration.
-
On the Centrify 360 Setup page in Business Central, click the Power BI Online > Update Semantic Model action.
-
Centrify 360 will republish the updated Semantic Model to the workspace, keeping all existing report bindings intact.
|
The Update Semantic Model action only republishes the Semantic Model itself. |
5. Next Steps
After the automated deployment is complete, configure the following in Power BI Online:
-
Install and configure the On-Premises Data Gateway to allow Power BI Online to access your on-premises or local data sources.
-
Configure Row-Level Security (RLS) to map Power BI Online users to the correct security roles defined in the Semantic Model.
-
Enable Scheduled Refresh on the Semantic Model to keep report data up to date automatically.